In general, you are often using sleep mode when you want to leave your machine for something and reach the machine to a lower power level. In here, you are going to get to know about how to turn off auto Sleep on your Windows 10 Operating system. Now Get ready for it.
- Click on the Setting button on the lower-left corner of your Start Menu
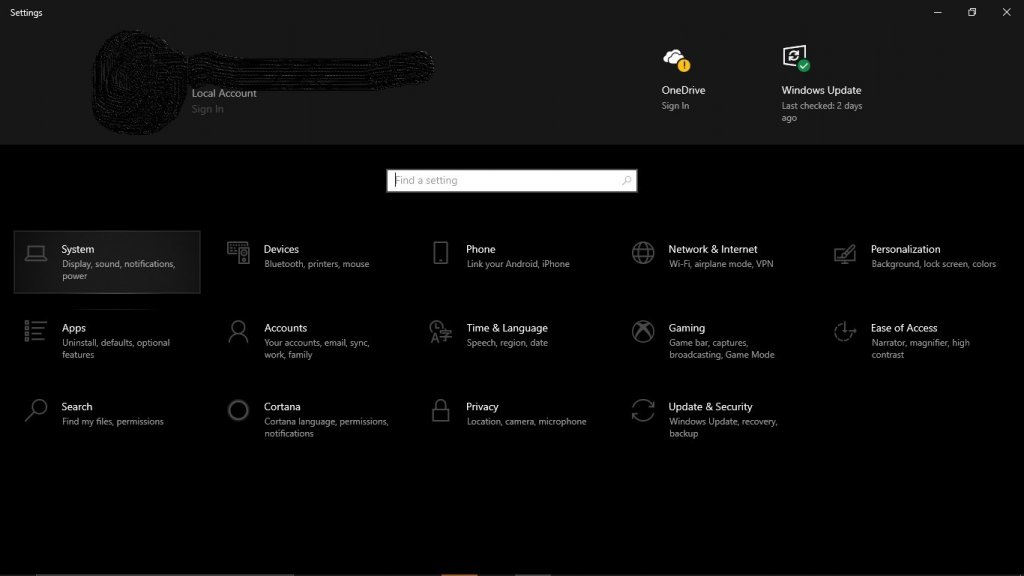
- Now Click on the System Settings which you can see at the beginning. Here you will find System settings like Display, Sound, Battery Storage, and many other System setting options.

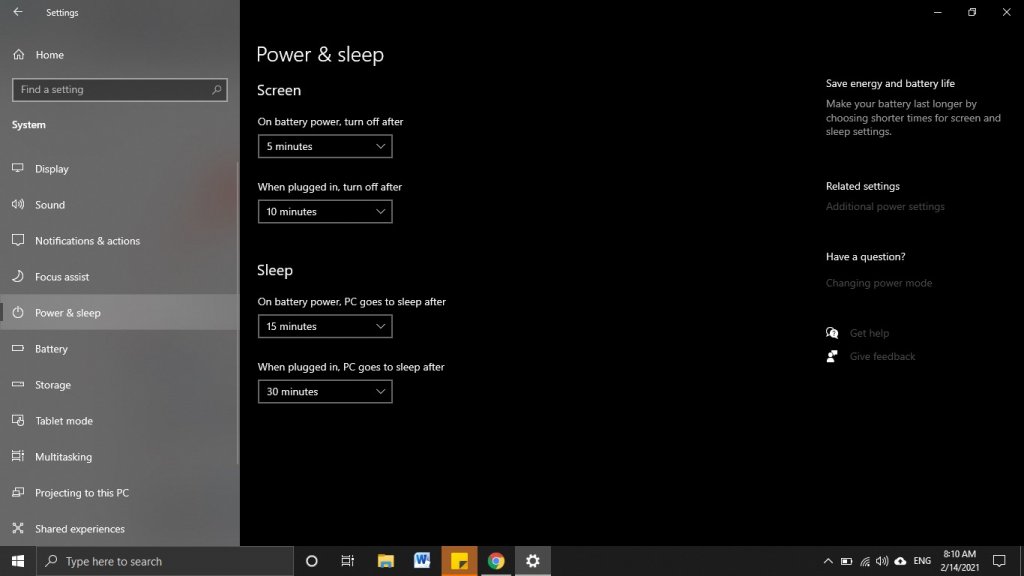
3. Select Power & Sleep on the left side of the window. There you will find two kinds of drop-down menus. "Screen" drop-down menus are given to set the screen off time and the "Sleep" drop-downs give the Sleeping time.
[g_article_ads]

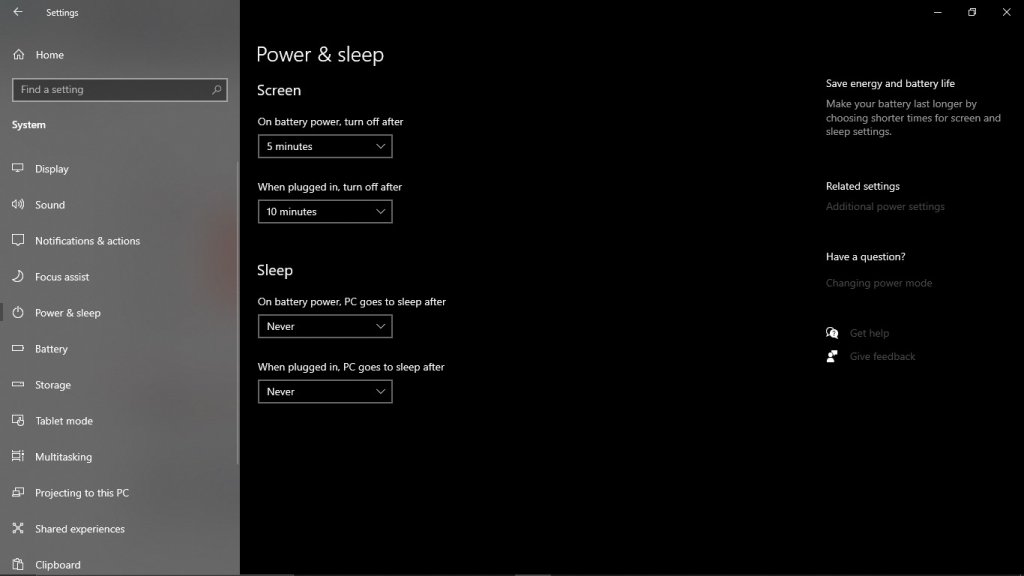
4. Under Sleep, there are two drop-down menus. They specify how much time you want your PC to stay awake when the charger is plugged or when not plugged. Put "Never" on both of them to turn off the auto sleep on Windows 10

Now you have a completely disabled Sleep mode on your Windows 10 PC. Now the PC won't go to sleep mode even if the charger is plugged or not. Let's think you need to turn them back on. Go through the same path and give the time that you need your PC into the Sleep Mode. Only pick your preferred time in the drop-down menu and you can set how long it takes to switch on sleep mode.
[g_article_ads]
However, Automatic sleep mode can also be very helpful to keep your battery life preserved. And if you forget to turn off your PC, sleep mode will help you a little bit to keep the PC without switching off because of the battery dead. It's also perfect if you want to quit your machine for a short time. Yet you're not willing to shut down all your programs.
Author of Get Basic Idea – The Knowledge Base / Bachelor of Technology – BTech, Mechatronics, Robotics, and Automation Engineering.
