
You can use several methods to change the administrator name on Windows 10 operating system. The methods and the steps that you should follow are given below. You can choose the easiest method and try it on.
Change administrator name using Settings
- Click on the Start Menu
- Press the Settings button to go to Settings
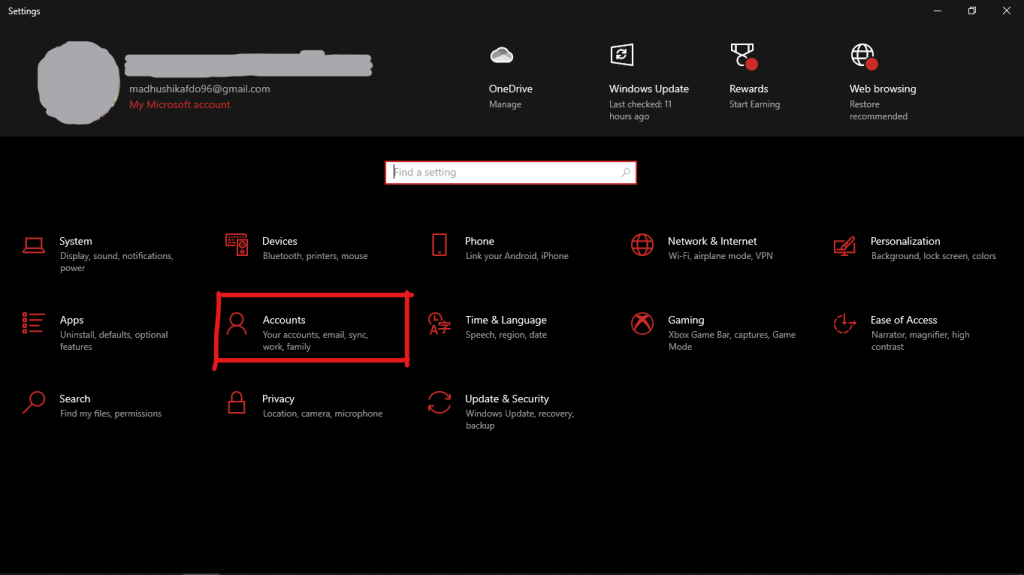
- Now Click on Accounts
- On Your Info Page find Manage My Microsoft Account and click on it
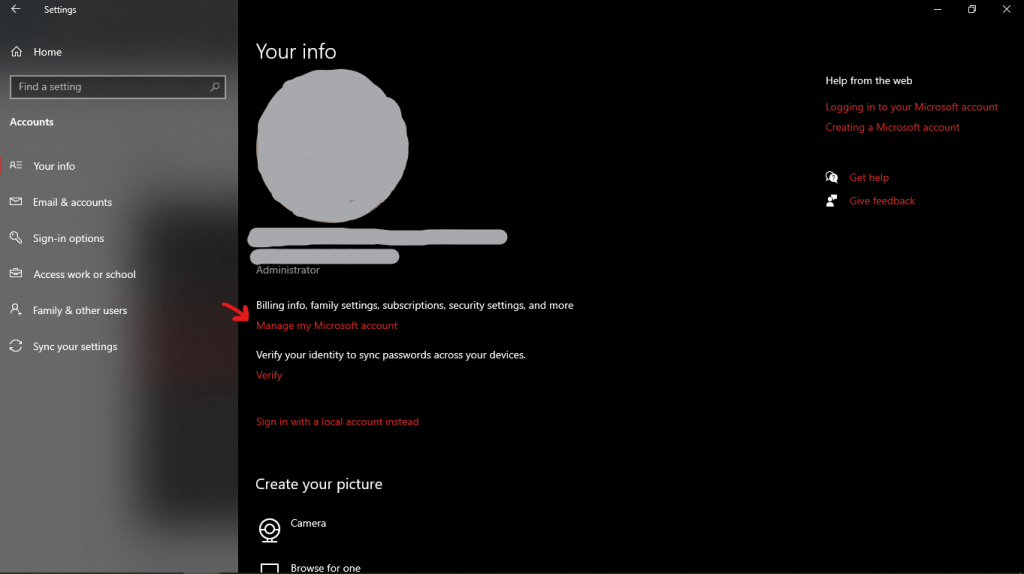
- The Microsoft web page will open
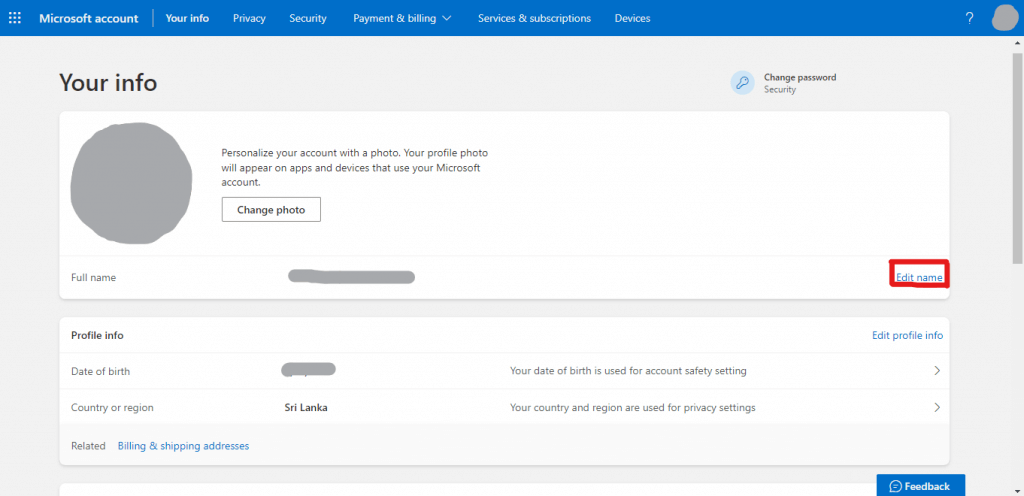
- Now Go to Your Info from the web page
- You will find Edit Name next to your name.
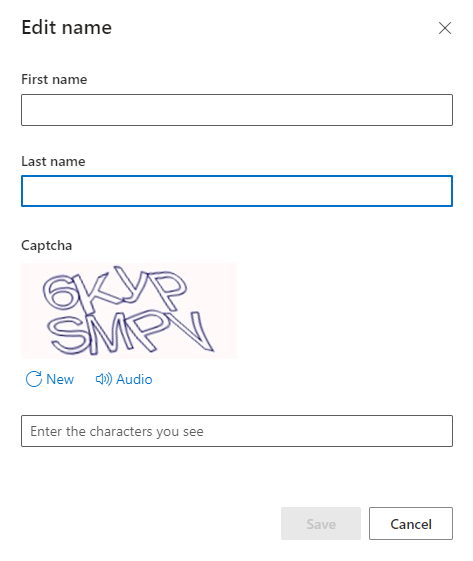
- Now, a pop-up will appear where you can change your name
- Change your name as wish and press Save
- After changing the name, Restart your Computer
Use Advanced Control Panel to change administrator name on Windows 10
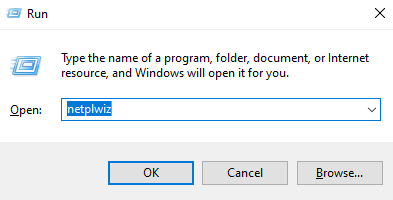
- Press Windows key + R to open the Run Command
- Type netplwiz on the search box
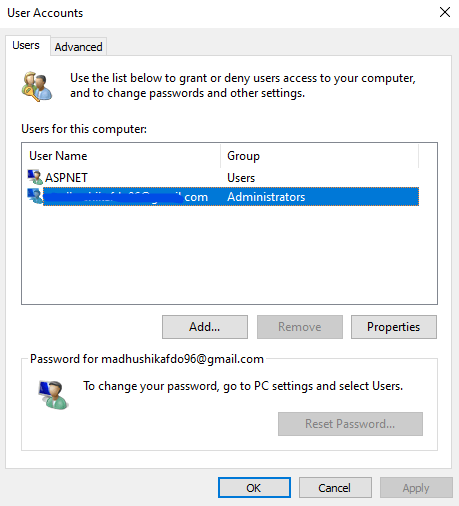
- It will show you all the accounts. Choose the account you need to rename
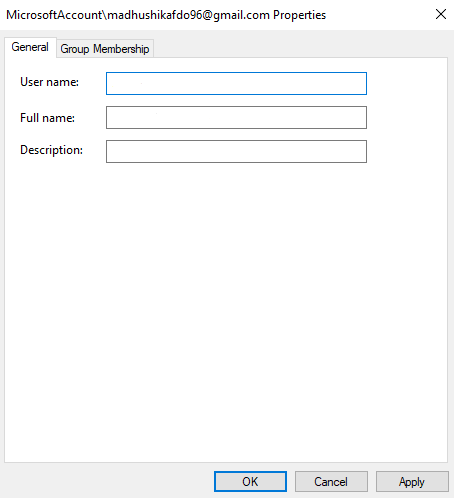
- Now press Properties
- You can change your name under General Tab and press Apply
Change Name using Control Panel
This method only works for the accounts which are not linked with the Microsoft Account. So if you are signed in with the Microsoft Account, please do not use this method.
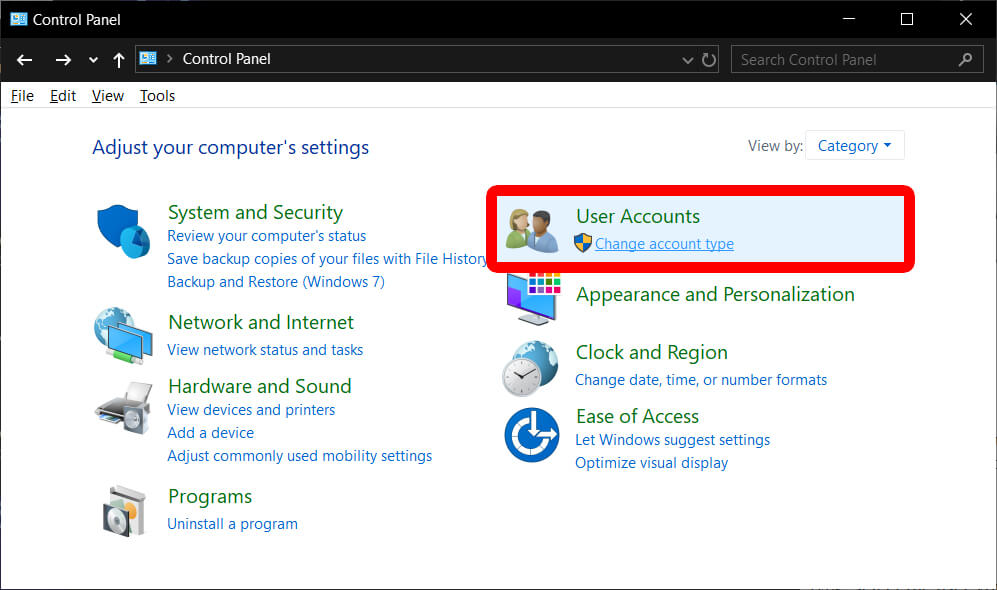
- Open the Control Panel
- Press the Change Account Type that you can find under User Accounts
- Now, select the account you want to rename
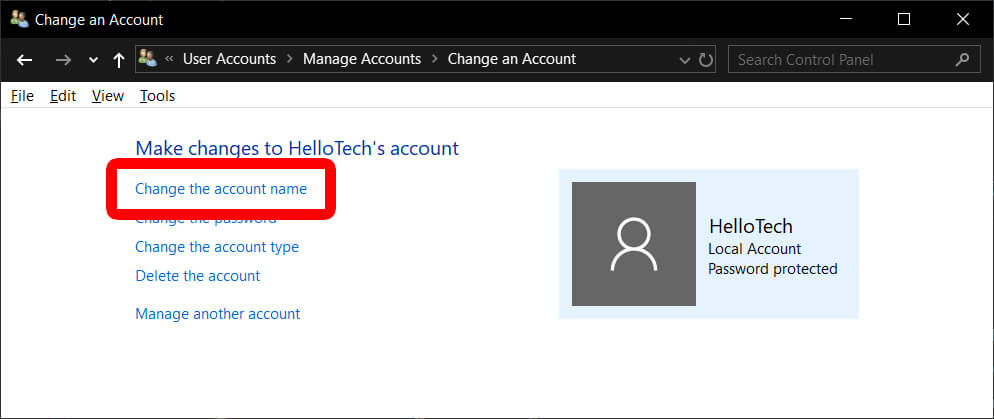
- Click on Change the Account Name option
- Type the name you wish on the box provided
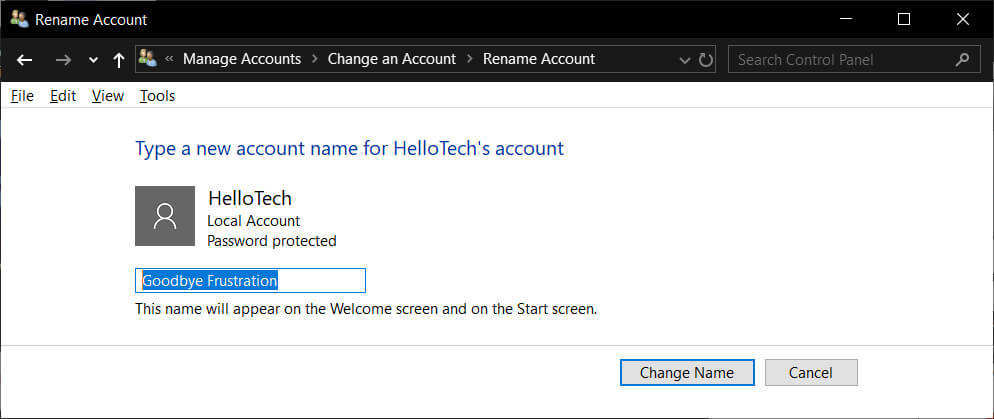
- Then click on the Change Name
Changing the administrator name on Windows 10 is a simple task. All you have to do is choose the right method.
Visit the previous guide about how to fix pen drive showing less capacity than actual.
Author of Get Basic Idea – The Knowledge Base / Bachelor of Technology – BTech, Mechatronics, Robotics, and Automation Engineering.